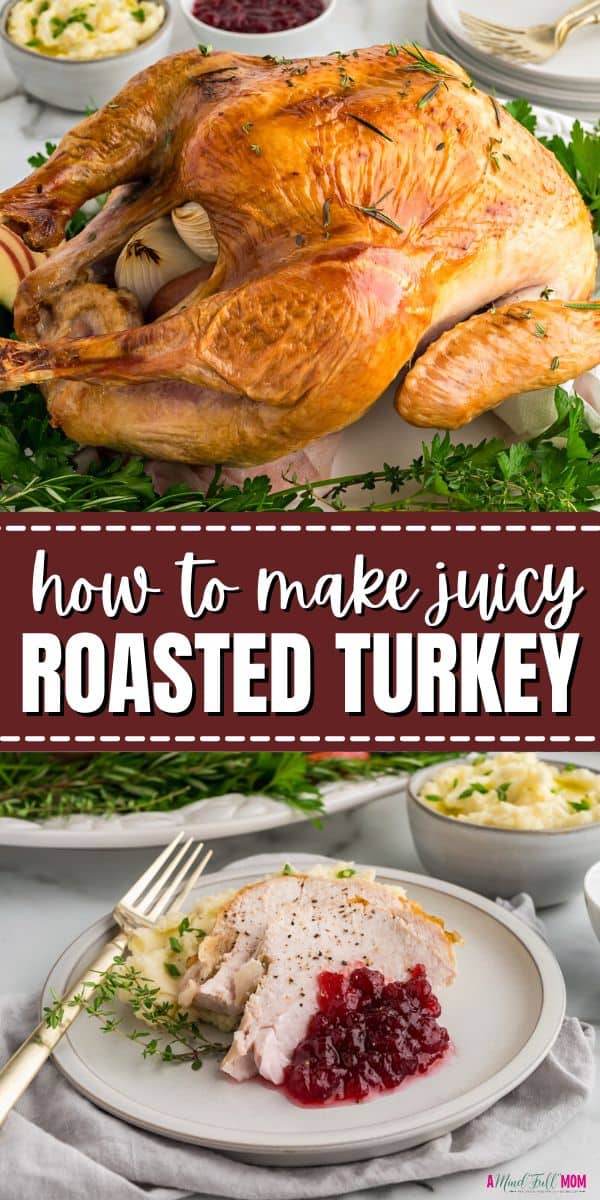
You do not need to be overwhelmed by the process of cooking a whole turkey. This method for cooking a turkey will produce a delicious, juicy, tender, roasted turkey that will wow your dinner guests with very little effort on your part!

When people find themselves in charge of cooking a turkey, they can oftentimes become overwhelmed. Worse yet, they don’t plan accordingly and find themselves with not enough time to thaw or cook a turkey and dinner can be ruined. That does not need to be the case!
I am going to break down a simple process for cooking a turkey that will work with any variety of turkey. Brined or not, big or small, and fresh or frozen. This is the only recipe for a whole turkey you will ever need.
Even better news, cooking a turkey is actually quite easy! And when prepared using this method, your turkey will be flavorful, juicy, and tender, not at all dry. Just be warned, you may be put in charge of cooking the turkey every year!
What You Need to Cook a Turkey

Before you start to prepare your turkey, you need to ensure you have the right equipment and ingredients.
- Turkey: This method for cooking turkey works with a fresh or frozen turkey. If using a frozen turkey, you will need to fully thaw the turkey before roasting.
- Roasting Pan: For a perfectly roasted turkey, you will want to use a roasting pan that is fitted with a roasting rack. You don't need an expensive pan, but be sure you select a pan that will fit your turkey.
- Oven-Safe Thermometer: A meat thermometer is a must-have to ensure you don't overcook your turkey. I highly recommend using an oven-safe thermometer with an alarm, so you can set it and forget it. Leaving you with time to worry about the side dishes or setting the table.
- Vegetables/Fruit (optional): To add a bit of additional flavor to the turkey, I recommend adding onion, apple, and celery to the cavity of the turkey. The vegetables and fruit will infuse the meat with a bit of flavor but this is not optional.
- Canola Oil: The canola oil will help the turkey skin brown and crisp up. Don't be tempted to substitute the oil with butter. We will be roasting the turkey at such a high temperature to start, the butter would burn.
- Seasoning: If you don't brine your turkey before roasting, you will want to season the turkey before roasting. You can simply use kosher salt and black pepper or your favorite poultry seasoning blend.
- Brining Bag (optional): If you decide to brine your turkey before cooking it, you will need a brining bag or leak-proof large vessel that can hold your turkey and brine.
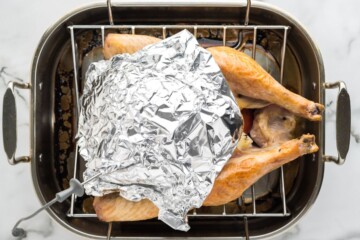
- Aluminum Foil: In order to prevent the breast from browning too quickly, you likely will need to tent the turkey breast with a bit of foil. I recommend resting the turkey tented in foil after cooking as well.
The Best (and Easiest) Way to Cook a Whole Turkey
Step One: Thaw Turkey if Needed
If using a frozen turkey, the most crucial step to cooking a turkey is to thaw your turkey fully before cooking the turkey. This is often the most miscalculated or overlooked step when it comes to cooking turkey. You need to plan for 24 hours per every 5 pounds of turkey for thawing. If you plan to brine your turkey, keep in mind you will want your turkey to be fully thawed 12-24 hours before you plan to cook the turkey.
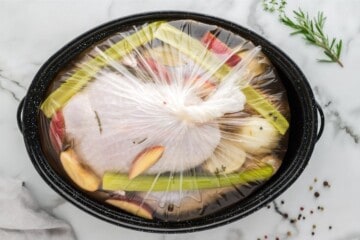
Step Two: Brine Turkey (optional)
While not necessary, preparing a brine to soak the turkey is never a bad idea. Any turkey, frozen or fresh, will taste better benefits if brined using my Turkey Brine Recipe prior to cooking. The white and dark meat will become perfectly seasoned and stay moist when cooked if you first brine your turkey.

Step Three: Prepare for Roasting
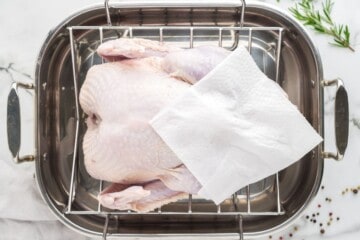
It is best to take the chill off your turkey for 30-60 minutes before roasting the turkey. This will help the skin to crisp up AND the turkey to cook evenly. Use this time to also preheat your oven. I also recommend patting the turkey with paper towels to dry the skin, as that will help the skin to crisp up while the turkey roasts.
- If you did NOT brine your turkey, now is the time to remove the turkey from the packaging, and remove the bag of giblets, which could be in either the body or neck cavity. Remove and discard the plastic pop-up timer as well. Place the turkey on the roasting pan breast-side up.
- If you DID brine your turkey, remove the turkey from the brine, rinse it well, and then place the turkey on the roasting ban breast-side up.

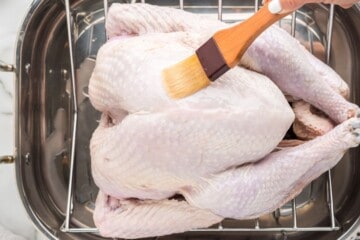
Step Four: Season
When prepared correctly, you don't really need much to prepare a flavorful turkey, especially if roasting a brined turkey. I recommend brushing with canola oil, which will help the skin crisp up. If you didn't brine the turkey liberally sprinkle the turkey with kosher salt and pepper or poultry seasoning. I also recommend placing onion slices, apple slices, and celery into the cavity of the turkey, which will help infuse flavor into the meat of the turkey.

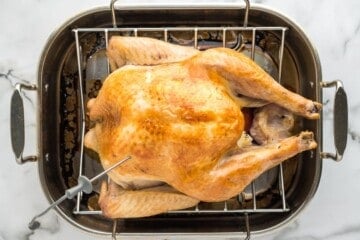
Step Five: Roast
The key to ensuring your turkey has crispy skin and yet stays juicy comes down to two things. The first is to roast your turkey at a high temperature for the first 30 minutes. This will allow the skin to turn a beautiful brown, and work to in a sense sear the skin of the turkey which will help to keep the juice inside the meat of the turkey. The second key is to roast your turkey until it reaches exactly 161 degrees Fahrenheit in the thickest part of the breast. This will ensure that your turkey does not overcook, but is safe to eat as it will reach 165 degrees F after it rests.

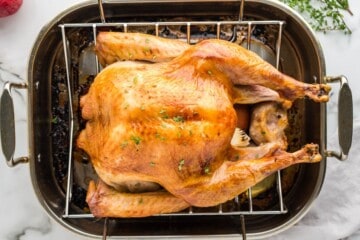
Step Six: Rest Turkey
You MUST rest your turkey before carving it! This will not only help the turkey to fully reach the appropriate temperature, but it will also keep your turkey meat nice and juicy. You can use this time to make turkey gravy OR put the finishing touches on your side dishes.
Step Seven: Carve & Serve
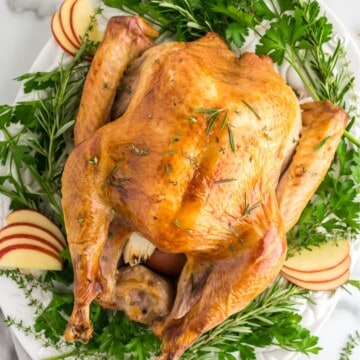
You can present your turkey whole on a platter for serving or you can carve it before bringing it to the table.
While you may be nervous about carving a turkey, don't be! It is just like carving a chicken--albeit a large chicken. You just need a sharp knife and a bit of patience. And even if you struggle to beautifully carve your turkey, it will still taste delicious.
- To carve the turkey, remove the wings and then the thighs first. The best way to do this is to pop out the joints that adhere the wings and thighs to the bird and then cut straight through the joint. Separate the thighs and drumsticks if desired.
- To carve the turkey breasts, slice the meat off the rib cage, cutting as close to the rib bones as possible. Cut the breast meat into individual slices if desired.
- Serve the turkey with or without turkey gravy and enjoy the juiciest turkey ever!

FAQs about Roasting Turkey
To help answer all your turkey cooking-related questions, here is a quick overview of the most frequently asked questions.
It is best to plan on 1 to 1 ½ pounds of turkey per adult guest and teen. If your gathering includes children, plan for ½ to 1 pound of turkey per child under 12.
Plan for 24 hours of thawing time for every five pounds of turkey. Add 1 extra day if you plan to brine the turkey before roasting.
No. However, I do find that the flavor and moisture imparted from a turkey brine will result in the absolute best-tasting turkey. That said, you can still have delicious results without messing with a brine!
Plan for approximately 10-13 minutes of cooking time per pound of turkey. When planning for your meal, be sure to account for the time it will take for the oven to come to temperature and for resting the turkey as well. This typically adds an additional 30-45 minutes to the total time needed to cook a turkey.
The turkey is done cooking when it reaches an internal temperature of 161 degrees Fahrenheit in the thickest part of the breast, and a minimum of 165 degrees F in the thickest part of the thigh. Turkey must reach 165 degrees F in all parts of the turkey before eating. After resting the breast meat should reach 165 degrees easily. Keep in mind that the only accurate way to measure this is to use a digital thermometer.
No! With this method for cooking turkey, there is no basting required. Especially if you brined your turkey before cooking it, which I highly, highly recommend, there is absolutely no need to baste your turkey.
Rest the turkey for at least 30 minutes, or up to 60 minutes before carving. This will give the juices time to redistribute throughout the turkey, keeping the meat tender and moist.
In my expert opinion, no. While the drippings from the turkey certainly add flavor, you will set yourself up for failure if you stuff your turkey. When the turkey is done cooking, your stuffing will not be safe to eat. If you cook your turkey long enough so that the stuffing is safe to eat as well, your turkey will be dried out. It is better to prepare Instant Pot Stuffing or Old-Fashioned Bread Stuffing in the oven and ensure your turkey stays moist and you don't end up with food poisoning.
How to Store Leftover Turkey
- Refrigerate: Carve the turkey as desired, or pull off the turkey meat from the carcass of the bird. Place the turkey meat into an airtight container and store it in the refrigerator for up to 4 days.
- Freeze: Place carved turkey meat into a freezer-safe bag, remove the excess air, and store it in the freezer for up to 3 months.
∗ important to remember∗
Be sure to refrigerate leftover turkey within 2 hours of removing it from the oven to prevent food poisoning.
Recipes Using Leftover Turkey
I personally opt to purchase a larger turkey than I need strictly to enjoy the leftover turkey meat. You can check out my favorite leftover turkey recipes below, use the leftover turkey meat in any recipe that calls for leftover rotisserie chicken, or in one of my leftover Thanksgiving recipes.
∗ Bonus Recipe for Turkey Stock∗
Save your turkey bones to make delicious turkey stock using my recipe for Homemade Chicken Stock or Instant Pot Chicken Stock.
Serving Suggestions
While this roasted turkey deserves to be the star of the show, you can't forget the sides, especially if preparing a Thanksgiving Turkey. Below are some of my favorite side dishes to pair with turkey. For more inspiration enjoy all of my easy Thanksgiving Recipes.
I hope these step-by-step directions for cooking turkey gave you confidence that you can prepare a delicious turkey that will wow your guests! If you gave this recipe a try, please be sure to leave a comment.
How to Cook A Whole Turkey - No Basting Required!
Ingredients
- 1 whole turkey
- 1 recipe turkey brine optional
- ¼ cup canola oil
- kosher salt and pepper
- 1 quartered onion optional
- 1 quartered apple optional
- 2 stalks celery
Instructions
Prepare Turkey
- Thaw your turkey in the refrigerator if needed. Plan for 24 hours for every 5 pounds of turkey.
- Once your turkey is thawed, remove the packaging, remove the bag of giblets, which could be in either the body or neck cavity. Remove and discard the plastic pop-up timer as well.
- If desired, and highly recommended, brine your turkey using a cooled turkey brine. Place the turkey into a large brining bag or container and pour the brine over the turkey. Cover with additional water until the turkey is fully submerged. Cover/seal the bag and refrigerate the turkey in the brine for 8 to 18 hours.

Cooking the Turkey
- Remove the turkey from the refrigerator 30-60 minutes prior to roasting. During this time, preheat your oven to 500°F. If your oven does not reach 500°F, set it to a minimum of 450°F.
- If you brined your turkey, remove the turkey from the brine, rinse it well, and then place the turkey on the roasting pan breast-side up and pat dry with paper towels. If you did not brine the turkey, be sure you have removed the packaging, pop-up timer, and giblets, which could be in either the body or neck cavity. Place the turkey on the roasting pan breast-side up. Pat the turkey dry with paper towels.
- If desired, add the quartered onion, apple, and celery stick to the cavity of the turkey. Brush the skin liberally with canola oil. If you did NOT brine your turkey, liberally sprinkle your turkey with salt and pepper. Tuck the wings under the turkey.
- Roast the turkey on the lowest rack in the preheated oven for 30 minutes. After 30 minutes, reduce the oven to 350° F and insert an oven-safe digital probe thermometer into the thickest part of the breast.
- Cook the turkey until the thermometer reaches 161 degrees F. If you notice your turkey breasts are browning too quickly, carefully tent them with foil, leaving the legs and thighs exposed. Plan for approximately 10-13 minutes of cooking time per pound of turkey.
- Once the turkey breast reaches 161 degrees, remove the turkey from the oven and check the temperature in the thickest part of the thigh. If not at 165 degrees F, not 161 degrees like the breast put the turkey back in the oven for another 10 minutes, then recheck the temperature.
- Remove the turkey from the oven and tent it with foil. Allow the turkey to rest for at least 30 minutes or up to 60 minutes if needed.
- After resting the turkey, carve and serve the turkey. To carve the turkey, remove the wings and then the thighs first by popping out the joints that adhere the wings and thighs to the bird and then cut straight through the joint. Separate the thighs and drumsticks if desired. To carve the turkey breasts, slice the meat off the rib cage, cutting as close to the rib bones as possible. Cut the breast meat into individual slices if desired.
Macky
Tried roasting a whole turkey for the first time! Followed the steps, brined it overnight for extra juiciness. The skin turned out crispy, the meat was juicy and flavorful. Perfect!
Kristen Chidsey
Wonderful thank you for sharing!
Abby
Used this method for Thanksgiving this year and it turned out amazing! So juicy and tender.
Kristen Chidsey
Thanks for sharing, Abby!
Melissa
So many great tips that helped me. I love the tip about letting your turkey rest after removing it, this made a difference.
Kristen Chidsey
Hi Melissa! I am thrilled to hear the tips helped you enjoy your Turkey 🙂
Sha
We had this for Thanksgiving and everyone liked it! We almost had no leftover! So tender and juicy. I'm keeping this!
Kristen Chidsey
That's wonderful! Thank you for sharing!
Kristyn
I love all your tips!! I have never been the turkey maker, but your recipe is fool-proof & makes the best turkey!!
jess
this has become the most anxiety-relieving recipe, thank you so much for sharing this recipe to calm my nerves of making turkey for the first time
Kristen Chidsey
YAY! So happy I calmed your nerves! Happy Thanksgiving!
Kara
Such great tips! Brining made a big difference in the juiciness of the turkey - thanks!
Kristen Chidsey
It really does make a huge difference!