Made with a vanilla wafer crust and a creamy cheesecake batter, these Mini Cheesecakes are a perfect bite-sized dessert.

I have been making this mini cheesecake recipe for decades. It is my go-to dessert recipe when I need something simple that is guaranteed to be a hit.
- Super Simple Recipe: These individual cheesecakes are incredibly easy to make. We are talking uses only one bowl and a handful of ingredients. Truly easy-peasy!
- Delicious: These Mini Cheesecakes are perfection. A creamy, rich cheesecake that is just sweet enough, contrasted against a crisp vanilla wafer.
- Bite-Sized: Handheld, mini desserts are perfect for parties and gatherings of all sizes--no plates or utensils needed.
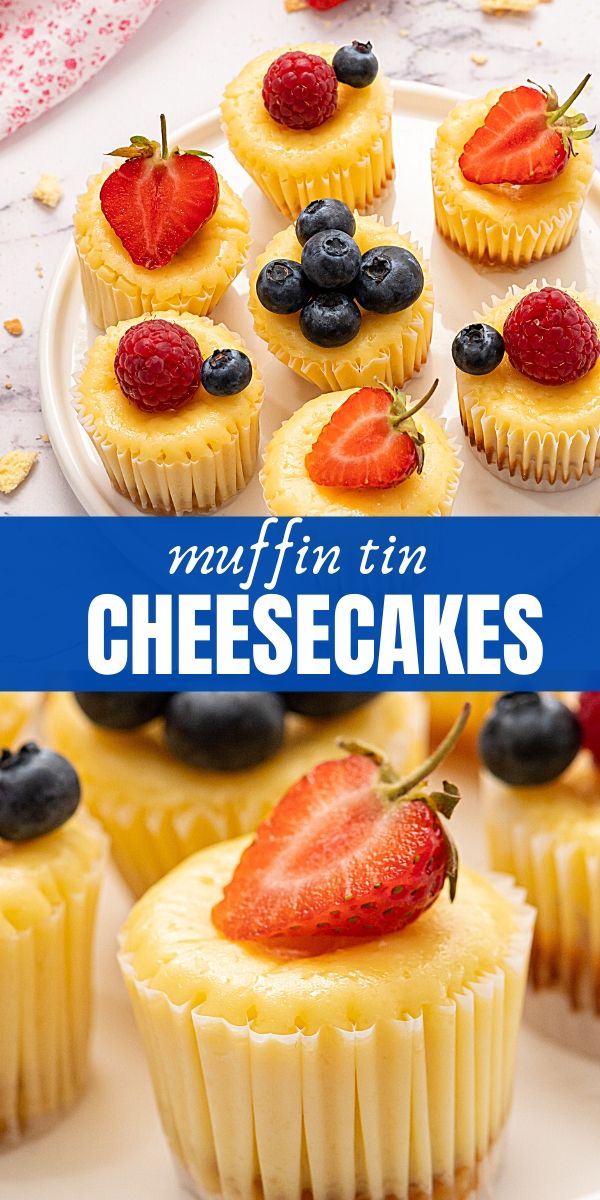
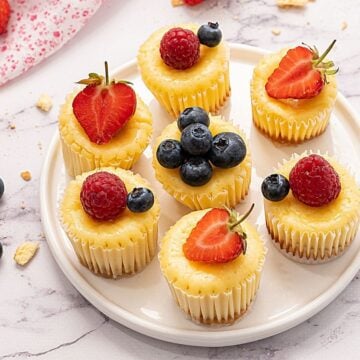
- Customizable: You can serve these mini cheesecakes plain or with a variety of toppings for your guests to pick and choose from for a fun, interactive dessert.
Whether you serve these individual cheesecakes for a party with a variety of toppings, or you make a small batch for your family to enjoy, one thing is for sure, it will be hard to stop after eating just one!
Notes on Ingredients

- Cream Cheese: You can use reduced-fat or full-fat cream cheese for this recipe, but DO NOT use fat-free cream cheese. The resulting texture will not be creamy. The most important thing you can remember to do when preparing a cheesecake of any kind is to let your cream cheese come to room temperature before preparing the batter. This allows the cream cheese to easily and evenly mix together to form a creamy, smooth batter.
- Vanilla Wafers: This is one recipe I take a shortcut and use Vanilla Wafers as the crust. I often use organic vanilla wafers or even make Homemade Vanilla Wafers, but any vanilla wafer will do. Mini vanilla wafers will fit better into a mini muffin tin!
- Toppings (optional): The toppings are endless for cheesecake. I suggest serving these mini cheesecakes plain and offering different topping options if serving at a party. Some topping ideas are fresh fruit, pie filling, chocolate syrup, caramel, chocolate chips, whipped cream, or lemon curd.
How to Make Mini Cheesecakes
- Line mini muffin tin pans with mini cupcake liners to keep the cheesecake from sticking to the pan and to provide a serving vessel for the mini cheesecakes.
- Place 1 vanilla wafer into each cupcake liner. It should JUST fit.

- In a large mixing bowl or stand mixer, beat the cream cheese until light and fluffy. Be patient, you don't want any lumps in the cream cheese, because that would result in lumpy cheesecakes.
- Add in eggs, sugar, vanilla extract, and lemon juice together until smooth and creamy. Be sure to scrape down the sides of the mixing bowl and then beat well again until your batter is fully incorporated together and creamy.

- Using a mini cookie scoop or a ½ tablespoon measuring spoon, portion out the batter evenly among the muffin cups. The batter should just cover the vanilla wafer.

- Bake the cheesecakes until the sides puff up and the center is still a TINY bit jiggly. They will continue to bake as they sit in the muffin tins, so you do not want to over-bake.
- Once baked, allow the cheesecakes to cool for 10 minutes in the pan and then remove them from the pan and cool for another 10-20 minutes on a cooling rack.
- Once cooled, place the mini cheesecakes into an airtight container and refrigerate for at least 2 hours before serving. Cheesecake always tastes better after refrigeration but because these are mini, they don't need to chill overnight, as a classic cheesecake recipe.
- Serve the mini cheesecakes plain or with any desired toppings like strawberries, blueberries, caramel syrup, chopped chocolate, or cherry pie filling--anything you like on cheesecake.

Make-Ahead and Storage Instructions
Bite-Sized Cheesecakes are great for a party because they can be made up to 4 days in advance, and unlike many foods, they taste better after refrigeration.
These mini cheesecakes also can be frozen if you happen to have leftovers or want to prepare longer than 4 days in advance. To Freeze Cheesecakes, let cheesecakes cool completely. Place on a baking sheet and place in the freezer until frozen solid--anywhere from 30 minutes to overnight. Transfer cheesecakes to a freezer bag and seal well. Store in the freezer for up to 2-3 months. Defrost in the refrigerator overnight before serving.
Recipe FAQs
Yes! As written, this mini cheesecake recipe makes 48 mini cheesecakes. Feel free to cut the recipe in half for a small gathering or to enjoy as a family. You can also double this recipe for a larger party.
Yes! But it will take a bit more work. Combine 1 cup of graham cracker crumbs with 2 tablespoons of granulated sugar and 3 tablespoons of melted butter until the mixture resembles course sand. Press 2 teaspoons of the mixture into each muffin tin and bake at 350 degrees F for 5 minutes.
More Favorite Dessert Recipes
- Instant Pot Cheesecake
- Banana Cake
- Ghirardelli Copycat Brownies
- Neiman Marcus Cookies
- Blueberry Pie Bars
- Hot Milk Cake
I would love to know how you enjoy these Party Perfect Mini Cheesecakes! Be sure to leave a comment and review below if you gave this recipe a try.
Mini Cheesecakes
Ingredients
- 48 mini vanilla wafers
- 16 ounces cream cheese room temperature (2 (8-ounce) packages)
- 2 eggs room temperature
- ½ cup granulated sugar
- 1 teaspoon vanilla extract
- 1 teaspoon fresh lemon juice
- any desired toppings
Instructions
- Preheat the oven to 350℉and line 48 cups in mini muffin tings with mini cupcake liners.
- Place 1 mini vanilla wafer into each cupcake liner, pushing down gently if needed.
- In a large mixing bowl or stand mixer, beat the cream cheese on medium speed until light and fluffy. To the cream cheese, add the eggs, sugar, vanilla extract, and lemon juice. Mix on medium speed, until the mixture is smooth and creamy.
- Using a mini cookie scoop or a ½ tablespoon measuring spoon, portion out the batter evenly among the 48 muffin cups.
- Bake for 12-15 minutes or until the cheesecakes' sides puff up and the center is still a TINY bit jiggly, being careful to not overbake.
- Remove the cheesecakes from the oven and place the pan on a cooling rack to cool for 10 minutes. Carefully remove the cheesecakes from the pan and cool for another 10-20 minutes, or until cool to the touch.
- Place the cheesecakes into a sealed container and store them in the fridge for at least 2 hours, or until completely chilled, before serving.
- Serve plain or with fresh fruit, pie filling, chocolate, whipped cream, etc.
Equipment Needed
Notes
Nutrition
This post was originally published in 2018 but was updated in 2020 with a video and new pictures.
Ms. A
These mini cheesecakes were the perfect make ahead dessert for our weekend brunch. So easy to make and there wasn't any leftover.
Kristen Chidsey
What a great treat for brunch and thanks for taking the time to leave a review 🙂