
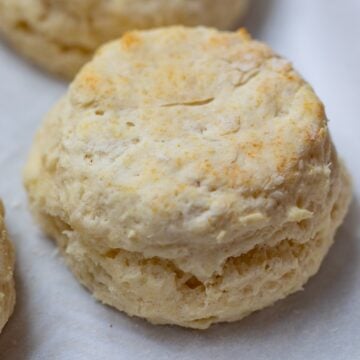
This is the best recipe for homemade biscuits. The dough comes together quickly and the biscuits bake up to fluffy, golden perfection.
Nothing beats a buttery, flaky homemade biscuit. Whether slathered with homemade chia jam, used as a breakfast sandwich, served with soup, or used as a base for sausage gravy, this recipe for biscuits is nearly as easy as opening a can of biscuits but tastes a million times better!

I have to admit that I grew up eating homemade rolls, not biscuits.
But when I moved south as an adult, I quickly discovered I had been missing out. When prepared correctly, nothing beats a homemade biscuit.
After learning from my southern friends their tips and tricks, I have created a recipe for Buttermilk Biscuits that have a perfect crumb and are light, tender, and full of flavor.
And with this SIMPLE recipe, you too can master making perfect biscuits. In fact, once you see how easy it is to make homemade biscuits, you will never purchase canned biscuits again!
Notes on Ingredients
This recipe for Buttermilk Biscuits only requires 6 ingredients, well 7 if you want to make your own buttermilk, I have included instructions for making homemade buttermilk if you don't keep it on hand.

- Flour: All-Purpose or whole white wheat flour is best for homemade biscuits. I often use whole white flour, as it is 100% whole grain, but still produces a light and tender crumb.
- Butter: This is an all-biscuit recipe, which is the BEST kind of biscuit. Be sure to use unsalted butter, so you can control the sodium content.
- Buttermilk: Buttermilk is used due to its acidity as well as its fat and liquid content. It will react slightly with the baking powder to help the biscuits rise in the oven and add a slight tanginess to the biscuit. But you do not need to purchase buttermilk, you can simply make your own by using a combination of milk or cream with lemon juice or vinegar.
No Buttermilk? Make homemade buttermilk by pouring 1 teaspoon of lemon juice or white vinegar into a glass measuring cup and pouring milk into the measuring cup until it reaches the ¾ cup line. Place the mixture in the refrigerator until ready to use, at least 5 minutes, allowing time for the acid to cure the milk.
Secrets to Making the Best Biscuits
While homemade biscuits are quite easy to make, there are a few tips I want to share with you to achieve perfect biscuits every single time.
- Use frozen, grated butter. The secret to really great biscuits is COLD butter. The butter will melt when baked forming air pockets in the dough, and keeping the biscuits light and fluffy. To get perfect results, it works best to grate the butter, using a cheese grater or food processor fitted with a grater, and then freeze for 15-20 minutes before preparing the batter.
- Keep everything cold. Not only do I use cold butter to make homemade biscuits, but I also am sure my buttermilk is cold AND my tools are cold. Along with sticking the butter into the freezer after grated, I also recommend placing the food processor bowl or pastry cutter into the freezer as well.
- Use the right equipment. To cut the butter into the flour mixture, use either a food processor fitted with the dough blade, a pastry cutter, or 2 forks. I love to use a food processor, as it keeps the entire process super simple.
- Do not overmix. You want the dough to JUST come together and the butter and milk to be evenly distributed through the flour. Overmixing the dough will result in tough biscuits.
- Do not roll your dough. Instead of using a rolling pin to roll out the biscuit dough, gently shape the dough using your hands. This is another trick to fluffy biscuits.
How to Make Homemade Biscuits
- Use a cheese grater or food processor to grate cold butter.
- Place grated butter into the freezer for 15-20 minutes.
- If not using prepared buttermilk, prepare homemade buttermilk. Pour 1 teaspoon of lemon juice or white vinegar into a glass measuring cup, and pour milk into the measuring cup until it reaches ¾ cup total. Place the mixture in the refrigerator until ready to use, at least 5 minutes.
- Whisk together the flour, salt, and sugar in a medium-sized bowl or pulse together in the base of a food processor that has been fitted with a plastic dough blade.

- Using a pastry cutter, or 2 forks, cut the butter into the flour mixture until the butter is the size of peas and distributed it throughout the flour. Alternatively, if using a food processor, add the butter to the flour and pulse several times until the butter is the size of peas.
- Add the buttermilk to the flour mixture. Mix with a wooden spoon until just combined or pulse in a food processor 3-5 times until buttermilk is evenly distributed into the flour mixture, being careful to not overwork the dough.

- Lightly flour a working surface, and turn out the dough onto the surface. Using your hands, gently fold the dough together and then fold the dough over itself 3-4 times.
- Lightly pat into a 1-inch circle.

- Using a 2-¾" round biscuit cutter, cut out 4 biscuits, as close together as possible. Gently pat scraps back together to cut out another 2 biscuits, for 6 biscuits total.

- Place biscuits onto a baking sheet that has been lined with parchment paper.

- If desiring golden biscuits, brush each biscuit with additional milk or buttermilk.
- Bake for 12-14 minutes, keeping in mind they will not brown as much as rolls, so do not overbake.

Serving Suggestions
Biscuits are best served warm, especially if you simply want to enjoy them slathered with jam or butter. However, there are endless ways to enjoy homemade biscuits. Below are a few of my favorite pairings.
- Serve biscuits with homemade breakfast sausage or baked bacon, an oven-poached egg, and a simple fruit salad for a delicious and hearty breakfast.
- Replace the English muffin with a homemade biscuit for a portable breakfast sandwich.
- Serve Homemade Sausage Gravy over warm biscuits for an unforgettable breakfast.
- Serve these buttermilk biscuits with a bowl of warm soup, such as Potato Corn Chowder, Instant Pot Vegetable Soup, or Vegetable Beef Soup.
- Instead of buns, serve Slow Cooker Pulled Pork or a Grilled BBQ Chicken Breast on a biscuit for an out-of-this-world BBQ sandwich.

Storing Biscuits
Homemade biscuits are best served warm, immediately after baking. If you do happen to have leftover biscuits, allow them to cool to room temperature and then store them in an airtight container for up to 48 hours at room temperature.
How to Freeze Homemade Biscuit Dough
Another option is to freeze biscuit dough to bake as desired, which is perfect for lazy or busy mornings.
To Freeze Biscuits, transfer unbaked, cut biscuits to a parchment-lined cookie sheet. Place the cookie sheet in the freezer and freeze the biscuits until frozen solid, about 2 hours. Place the frozen biscuits into a resealable freezer bag, and freeze them for up to 3 months.
To Bake Frozen Biscuits, preheat the oven to 475°F. Line a cookie sheet with parchment paper. Arrange the frozen biscuits on the sheet leaving at least 2 inches between each biscuit. Brush with buttermilk if desired and bake for 5 minutes. After 5 minutes, lower the heat to 425°F and continue cooking for 10 minutes or until the biscuits are just slightly golden.
Recipe FAQs
Yes! The acidity of the buttermilk reacts to the baking powder which helps keeps the biscuits light and fluffy.
Yes! You can cube up the butter into ¼-inch cubes and then freeze for 10 minutes before preparing the biscuits. However, I find that by using grated butter, it takes less time to work the butter through the flour and this, in turn, keeps the biscuits more tender.
No, not at all. I find a food processor to be quick and efficient, but there are directions for preparing without any special tools needed.
VERY! I can not stress the importance of using cold tools, cold ingredients, and handling the dough very little to ensure the best results.
It is normal for the dough to be a bit crumbly before kneading together. If after folding the dough together 3-4 times the mixture is still dry, add 1 tablespoon of additional buttermilk and work quickly to combine.
Chances are you overworked your dough, or your ingredients were not chilled well. Work with the dough as little as possible and if you feel you may have overhandled, wrap the dough in plastic wrap and refrigerate for an hour before cutting and baking the biscuits.
I find that the parchment paper not only helps to keep the biscuits from sticking to the sheet pan but also prevents the biscuits from overbrowing. If you do not have parchment paper, bake these biscuits on an ungreased, nonstick baking sheet.
No. While brushing your biscuits with a bit of buttermilk will help them to get golden brown, they are delicious, albeit paler in color, if you skip brushing the unbaked biscuits.
More Favorite Breakfast Recipes
I would love for you to leave a comment and review below sharing how you enjoyed this buttermilk biscuit recipe.
Homemade Biscuits
Ingredients
- 2 cups flour
- ½ teaspoon kosher salt
- ½ tablespoon granulated sugar
- 1 tablespoon baking powder
- 6 tablespoons unsalted butter grated and frozen
- ¾ cup buttermilk
Instructions
- Use a cheese grater or food processor to grate cold butter.
- Place grated butter into the freezer for 15-20 minutes.
- Preheat oven to 450 degrees. Line a baking sheet with parchment paper.
- Whisk together flour, salt, baking powder, and sugar in a medium sized bowl or pulse together in the base of a food processor that has been fitted with a plastic dough blade.
- Using a pastry cutter, or 2 forks, cut the butter into the flour mixture, until the butter is the size of peas and distributed throughout the flour. Alternatively, if using a food processor, add the butter to the flour and pulse several times until the butter is the size of peas.
- Pour in buttermilk into bowl or food processor. Mix with a wooden spoon until just combined or pulse in a food processor 3-5 times until buttermilk is evenly distributed into the flour mixture, being careful to not overwork the dough.
- Lightly flour a working surface, and turn out the dough onto the surface. Using your hands, gently fold the dough together and then fold the dough over itself 3-4 times.
- Lightly pat into a 1-inch circle.
- Using a 2-¾" round biscuit cutter, cut out 4 biscuits, as close together as possible. Gently pat scraps back together to cut out another 2 biscuits, for 6 biscuits total.
- Place biscuits onto the prepared pan, about 2 inches apart. If desiring golden biscuits, brush each biscuit with additional milk or buttermilk.
- Bake for 12-14 minutes, keeping in mind they will not brown as much as rolls, so do not overbake.
Karena
Hello. Can you make buttermilk this way with soy milk?
Kristen Chidsey
Yes! I have had great success using soy milk in place of dairy for this recipe--that said, I haven't had success with non-dairy butter.
Amy Anderson
Made these biscuits this morning and was so excited for how good they are! I had never grated the butter and made sure everything was cold-what a game changer!! Thanks Kristen!
Kristen Chidsey
You are so welcome Amy! I am so happy to hear the tip of grating butter made a difference for you--I find it key!
Brianna
I’ve been looking for a recipe like I grew up with for years but was never able to get the texture just right. These are perfect and easy to make. I’ve made them several times and they are always consistent. Thank you!
Kristen Chidsey
I am so happy you finally found the recipe that is just right for you:) We love these biscuits ourselves.
Jessica Formicola
We made these biscuits today and they were perfect! Thanks so much for sharing the recipe!
Kristen Chidsey
So glad you enjoyed Jessica!
Beth
These look amazing!! I love your tip to use grated, frozen butter - I am going to use that tip and this recipe, going forward!
Kristen Chidsey
It is a tip that helps so much! So glad you enjoyed